FREE UK tracked delivery
 Order by 12pm Mon-Fri for same day dispatch
November 2021 - Strategies to Avoid Winter Hazards
by Nigel Williams
The hazard exists on many other Munros of course, but the mapping here is perhaps the issue.
On the OS 1:50,000 unless one looks closely at the contours midway between the two cairns 1052m and 1049m, it appears that it is possible to walk in a straight line between them. There is no indication of a cliff or even an outcrop.
On the HARVEY Superwalker 1:25,000 map (Ben Alder) this is very much clearer. However, regardless of the mapping the hazard remains and needs to be avoided.
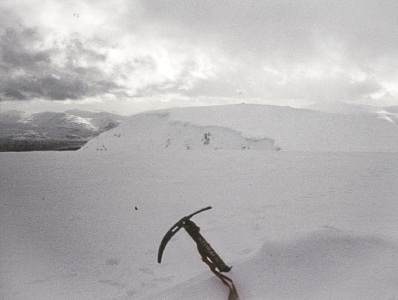
With the wind generally coming from a westerly direction, a considerable cornice develops along this east facing edge as can be seen from this photo at the 1052m summit looking south to 1049m top.
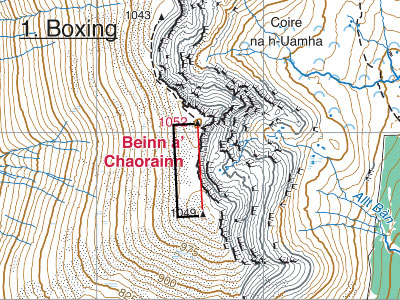
In this case it is easy to just go west for 100m pacing, then the original bearing for 600m, then back east for 100m. As the main direction of travel is roughly south or north there is no need to actually put the east and west bearings on the compass, just focus on going at right angles to the needle.
The second method is making a dog leg. Choose a point on the map midway between the two summits and well back from the edge. Put a dot on the map if possible, then measure the distance from your current summit to the dot, take a bearing from the map and pace it. Then same again from the dot to the second summit.
If there is no mark on the map it is difficult to be accurate for the second bearing.
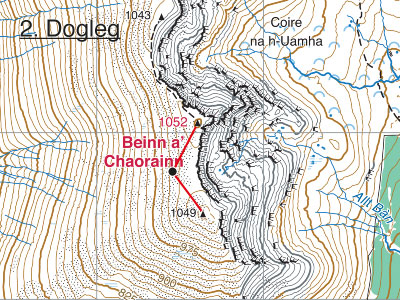
This whole ridge line from 1043 to 1049 is challenging in poor winter conditions whether travelling north or south if you decide that reaching 1052 is essential.
Return to the Navigation Blog